


Are you tired of smudging your freshly painted nails, waiting impatiently for them to dry, or shelling out cash at nail salons for professional manicures? Say goodbye to these woes and hello to salon-quality nails at home with the 300W Professional Nail Dryer Lamp. This fantastic nail dryer is a game-changer for nail enthusiasts, and today, we’re going to show you how to use it for perfect manicures. Are you ready to upgrade your nail game? Let’s get started!
Step 1: Gather Your Supplies
Before you begin, make sure you have everything you need:
Your favorite gel nail polish
A base coat and top coat
The 300W Nail Dryer Lamp
A nail file and buffer
Rubbing alcohol and lint-free wipes
Cuticle oil
Step 2: Prepare Your Nails
Start with clean, dry nails. If you have old nail polish, remove it using nail polish remover. Next, gently push back your cuticles and shape your nails using a nail file. A well-prepped nail surface ensures a long-lasting manicure. Say goodbye to smudges and waiting time, and say hello to beautiful, long-lasting nails. Happy manicuring!
https://s.click.aliexpress.com/e/_Dk71orH
Step 3: Apply a Base Coat
Apply a thin layer of base coat to your nails. This not only helps the gel polish adhere better but also protects your natural nails.
Step 4: Apply Gel Nail Polish
Now comes the fun part! Apply a thin, even layer of your favorite gel nail polish. Make sure to avoid the skin and cuticles for a neat finish.
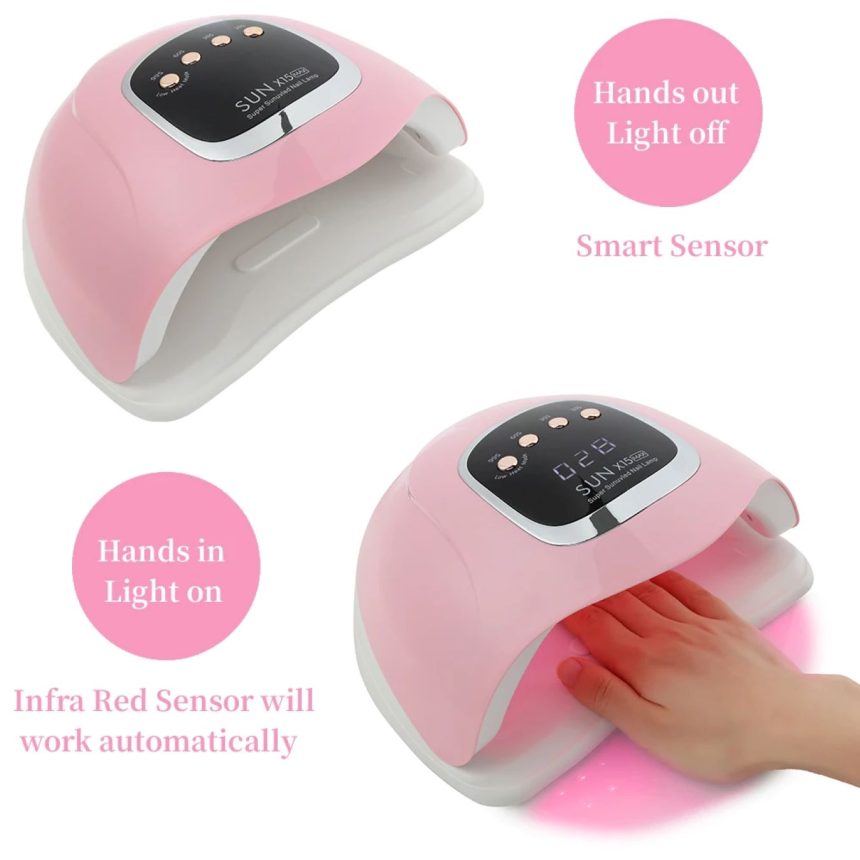
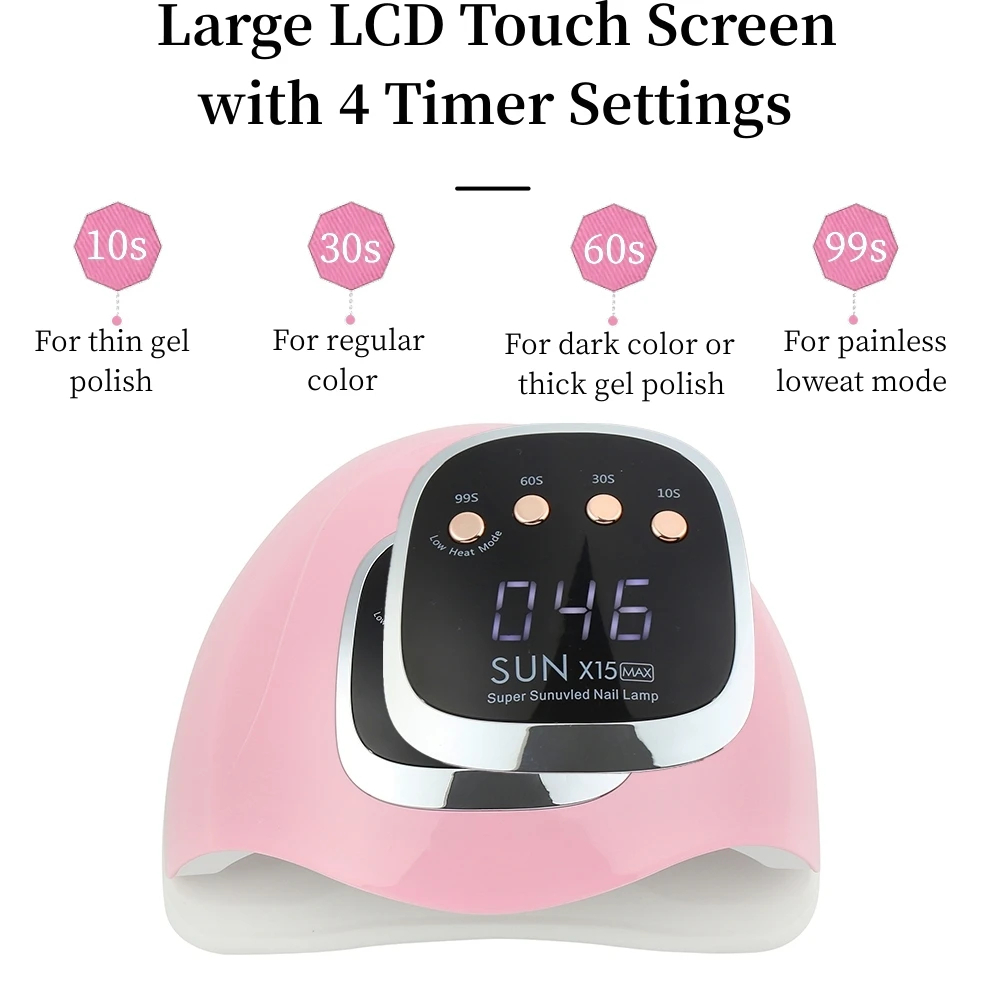
Step 5: Cure Under the 300W Nail Dryer Lamp
This is where your 300W Nail Dryer Lamp shines (pun intended). Place your hand inside the lamp, and it will start working automatically, or you can select your preferred time setting. Use the 10, 30, 60, or 99-second timer depending on the gel you’re using. The 99-second low-heat setting is ideal for protecting your hands while ensuring thorough curing.
Step 6: Repeat for Multiple Layers
If you’re applying multiple layers of gel polish, be sure to cure each layer under the lamp before adding the next one. This ensures a strong and glossy finish.
Step 7: Apply Top Coat
Once your colored layers are complete, apply a thin layer of top coat for added shine and protection. Then, cure it under the 300W Nail Dryer Lamp.
Step 8: Clean and Finish
After curing your top coat, your nails are ready to shine. Use rubbing alcohol and a lint-free wipe to remove any residue. Finish with a few drops of cuticle oil for healthy, hydrated nails.
Congratulations! You’ve just mastered the art of the perfect at-home manicure with the help of your trusty 300W Nail Dryer Lamp.
Ready to elevate your nail game? Don’t miss out on this fantastic product. Get your own 300W Professional Nail Dryer Lamp today!
https://s.click.aliexpress.com/e/_Dk71orH
Say goodbye to smudges and waiting time, and say hello to beautiful, long-lasting nails. Happy manicuring!


